Let the Good Times Roll!
While chasing and listening to faraway broadcast stations remains popular, interest in monitoring aircraft, utility stations, and Amateur Radio is at an all-time high ... providing many opportunities for nabbing a new country, a new state, or in the case of international aircraft received via HFDL, a new Grid Square.
Truly Good Times ... enhanced even further by exciting new gear, less interference, a smoking-hot solar cycle, and a new version of DXtreme Monitor Log.
Here's what's new in this release:
Topics
To Order
Logging Enhancements
1. Signal Modes Added / Transmission Modes Extended
Modes Modules — Signal Modes and Transmission Modes
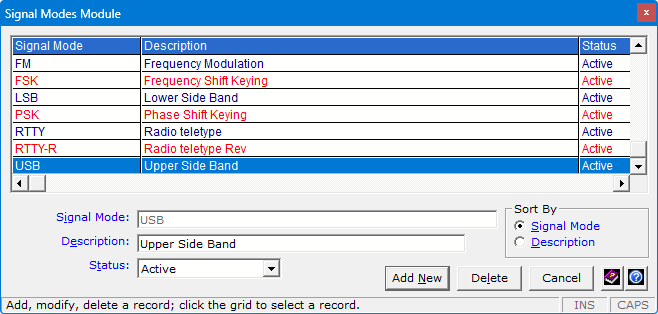
To further support the logging of utility and Amateur Radio stations, we have added a Signal Modes module to let you maintain a list of signal modes your receiver supports (such as AM, CW, FM, LSB, USB, RTTY, etc.).
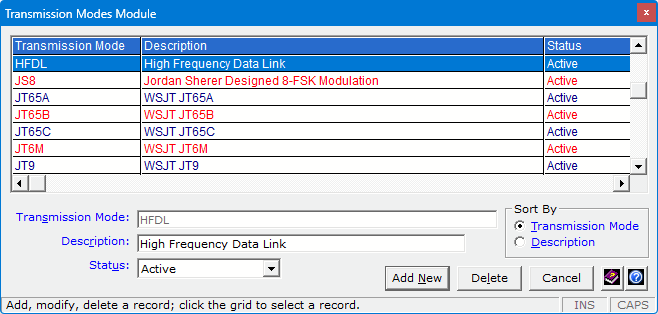
And have renamed the Modes module to Transmission Modes to let you maintain a list of transmission modes stations transmit (such as AM, CHIP, CONTESTI, CW , DOMINO, FAX, FM, FT4, FT8, HFDL, JT65, JT9, MFSK, MIL-STD-188-141A, MSK144, NAVTEX, OLIVIA, PACTOR-III, PSK, STANAG 4285, etc.).
Fields — Signal Modes and Transmission Modes
On the Monitor Log window, we've added a Signal Mode list box to let you select (or inherit from rig control) the mode to which your receiver is tuned. And we've renamed the Mode list box to Transmission Mode to let you select the mode the station is using to transmit information.
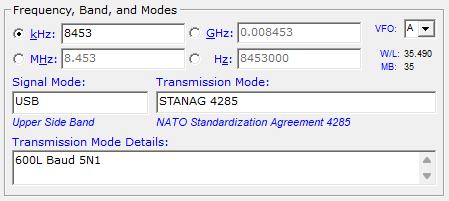
Transmission modes can be received on different signal modes, and it is important to disclose the signal mode employed when reporting reception — that way, readers can reproduce your monitoring environment and log the station themselves.
Here are a few reception report examples that can appear in the literature:
- MIL-188-110A/B HF modem, continuous mode idle (on LSB)
- 600bd/600 FSK UNID ARQ System, tfc (on LSB)
- 1200bps/L STANAG 4285 HF modem, crypto tfc (on USB)
- 08676.00 NPM: US Navy Hawaii, TX:Honolulu-Wahiawa, HWA, USB, STANAG 4481, Vancouver,Canada KIWI SDR
- CF FSK 50/850 STANAG 4481 (ENC) 05340.0 NAU: US NAVY ISABLEA, P.R.
Also on the Monitor Log window, we've added a new Transmission Mode Details box, which lets you type free-form information about the transmission mode received, such as baud rate, bandwidth, etc., as shown in the preceding examples (i.e. 1200bps/L). This information will be important to you and others, and should be included when reporting reception.
Signal Mode Association
The Signal Mode Association facility, available from the Edit menu, lets you associate signal modes with transmission modes globally, which is especially appropriate after updating from an earlier version of DXtreme Monitor Log.
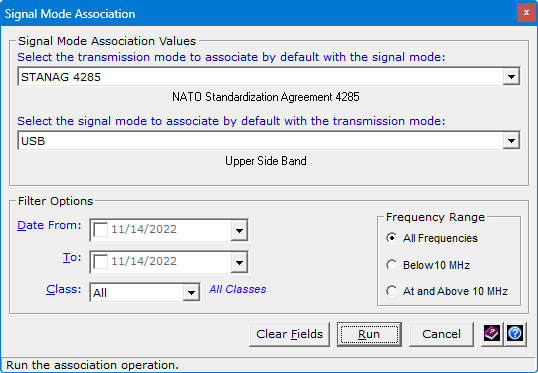
In your log, the top box lets you specify the transmission mode to associate by default with the signal mode specified in the bottom box. Standard filters are provided for optional use.
Note: The Mode Replacement facility available in previous versions has been renamed to Transmission Mode Replacement.
Log Variables
We have created Signal Mode and Transmission Mode log variables, which you can use in any script. We added them to Utility and Amateur Radio scripts designed to share log entry data with blogs and clubs and create reception reports.
- [signal-mode] — Contains the mode of the signal
(such as AM, CW, FM, LSB, USB, RTTY, etc.). - [signal-mode-description] — Contains a description
of the signal mode (such as Upper Side Band). - [transmission-mode] — Contains the mode of the
transmission (such as AM, CW , FAX, FM, FT4, FT8, HFDL, JT65, JT9, MFSK,
MIL-STD-188-141A, MSK144, NAVTEX, OLIVIA, PACTOR-III, PSK, STANAG 4285, etc.). - [transmission-mode-descr] — Contains a description
of the transmission mode (such as NATO Standardization Agreement 4285). - [transmission-mode-details] — Contains detailed
information about the transmission mode received (such as 600L Baud 5N1).
2. Frequency: Your Choice of kHz, MHz, GHz, or Hz
The Frequency, Band, and Modes area now has GHz and Hz (in addition to kHz and MHz) option buttons and boxes that let you select and type the desired unit of measure for log-entry frequencies. The remainder of the software uses kHz as the official unit of measure. Monitor Log 14 remembers the last option button selected.
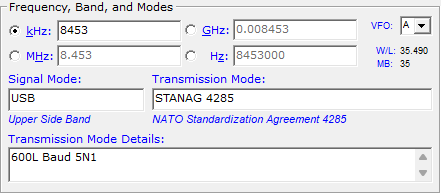
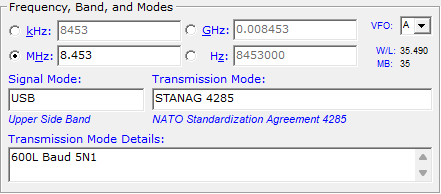
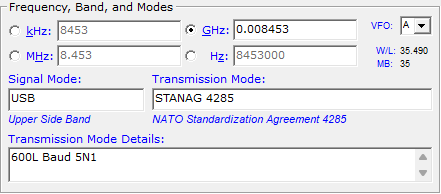
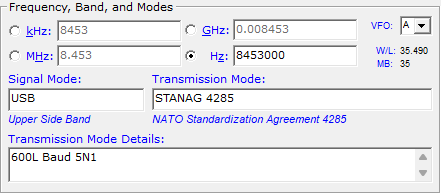
When you start a log entry from the Schedule Checker, or if Monitor Log 14 and your radio are configured to use rig control, the software populates all frequency boxes simultaneously.
3. Latitude and Longitude Boxes Moved
We have moved the Latitude and Longitude boxes to the Station tab of the Monitor Log window to make it more convenient to enter the coordinates of monitored stations (particularly aircraft and ships operating in international airspace and waters).
We also made it possible to enter coordinates in the Degrees-Minutes-Seconds format

And have the software convert the coordinates to the decimal format automatically.

4. Support for Grid Square Tracking
New Fields
We have added a Grid box and Auto Calc check box to the Station tab of the Monitor Log window to track Maidenhead grid squares when logging. The Maidenhead Grid Square system is popular with ham radio operators, especially on VHF and UHF, where VUCC rules regard contacts outside a DXCC entity as valid, such as maritime-mobile contacts.

You can type grid squares manually or have Monitor Log 14 calculate them automatically based on the coordinates entered in the Latitude and Longitude boxes.
Reports and Searches
We think tracking grid squares is particularly useful when monitoring/logging stations not located in traditional countries — like aircraft and ships operating in international airspace and waters. Both Performance and Stations reports let you track grids. Search functions let you find grid-based log entries for viewing or editing.
Global Update: Grid Calculation and Population
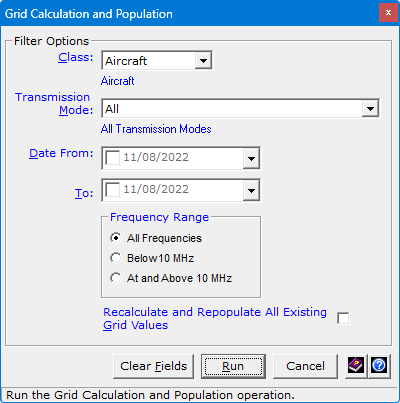
Monitor Log 14's Grid Calculation and Population facility lets you calculate and populate grid squares in log entries already containing exact latitudes and longitudes from previous releases. The facility is available from the Edit menu.
5. Accelerator Keys to Provide an Ad Hoc Logging Sequence
We have added accelerator keys to specific fields on the Station tab of the Monitor Log window to provide access to fields in an ad hoc fashion, in addition to the traditional Tab sequence. You can still use your mouse, of course.
When logging aircraft and ships operating in international airspace and waters, for example, it may be desirable to access fields in an alternative sequence. It's entirely up to you. The following table describes the accelerator keys.
| Press | To Access |
|---|---|
|
Alt-C |
Country |
|
Alt-D |
Date |
|
Alt-L |
Lat Long |
|
Alt-O |
Signal Mode Transmission Mode Transmission Mode Details |
|
Alt-U |
Auto Calc |
|
Alt-X |
Tx Site |
|
Alt-: |
Grid |
Example
Here's a sample sequence when logging aircraft flying in international airspace:
- Alt-N to start a new log entry. In the Station text box, type or paste the Flight ID.
- Shift-Tab once to the Station button to perform a Station Web Search. Press Enter to bring up the Search menu and use arrow keys to navigate to the desired search item (likely an aviation Web site defined in Preferences, one that accepts the Flight ID as a URL argument). Press Enter again to bring up the site. Information about the aircraft you're monitoring and logging appears.
- Shift-Tab again to the Class list box to select Aircraft.
- If necessary, Alt-U to the Auto Calc check box to activate the automatic calculation of grid squares based on the Latitude and Longitude of the aircraft. (Grid squares are an interesting way to track DX locations when the concept of Country doesn't always apply [such as when logging aircraft flying in International Airspace]. You can run Performance and Stations reports based on grid squares.)
- Alt-L to the Lat text box to type or paste the latitude.
- Alt-L again to the Long text box to type or paste the longitude. If desired, you can click the adjacent Long button (or Lat button) to find information about the aircraft from Web sites (specified in Preferences) that accept the coordinates of a flight in progress as URL arguments.
- Alt-C to the Country text box to type or select a country; or, when appropriate, a placeholder country like International Airspace.
- Alt-D to the Date box to type or accept the date of reception. Then Tab to the Time fields to adjust them, if necessary.
- Finally, Alt-O repeatedly to the Signal Mode, Transmission Mode, and Transmission Mode Details boxes to select modes, such as USB and HFDL, and any Transmission Mode Details you deem appropriate. Follow the usual logging sequence thereafter.
6. Placeholder Countries Enhanced to Satisfy Special Logging Conditions
To log stations not linked to a particular country, you can add placeholder countries to the Countries module and select the placeholders as countries when adding log entries on the Monitor Log window.
Placeholder countries can be temporary or permanent. After adding them to the Countries module, you can:
- Select a temporary placeholder country, such as Unidentified Pacific Islands, when adding a log entry for a station you cannot identify — yet! Later, when you've identified the station and its country, you can edit the log entry, specifying the official station name and country and adding any other information you desire.
- Select a permanent placeholder country, such as International Airspace, International Waters, or Space when adding a log entry for a station not located in a traditional country. At your option, you can specify the station's coordinates and track its location using Maidenhead Grid Squares (as described earlier).
7. Web Search Functions
Station
When you add, modify, or display a log entry, a Station button appears over the text box label of the same name on the Monitor Log window, provided the adjacent text box is populated. Clicking the Station button displays a context menu that provides Web search functions that are germane to the station name.
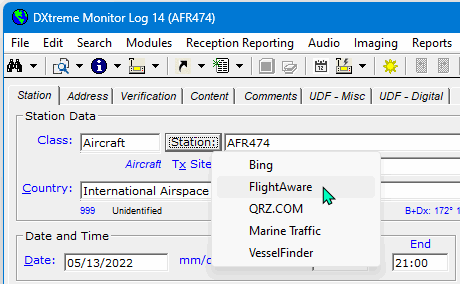
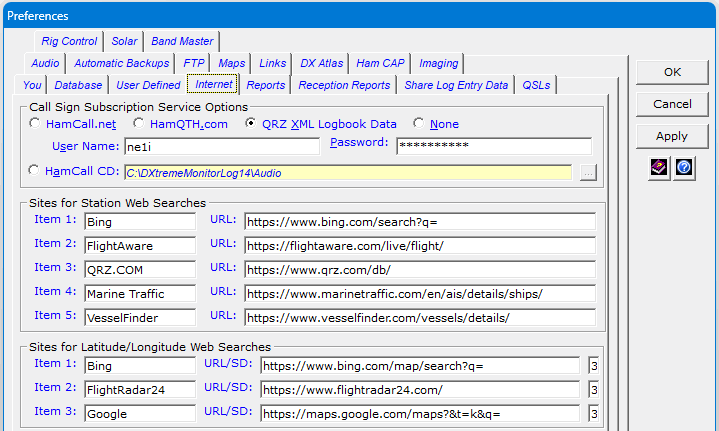
Default Web search functions are provided, but can be changed by you in Preferences. The Web sites chosen must accept the station name as a URL argument.
Lat/Long
When you add, modify, or display a log entry, Lat and Long buttons appear over the text box labels of the same name on the Monitor Log window, provided the adjacent text boxes are populated. Clicking the Lat and Long buttons display a context menu that provides Web search functions that are germane to geographic coordinates.
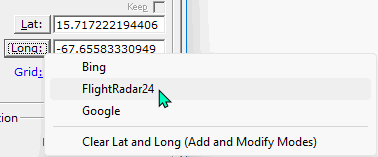
Default Web search functions are provided (see above), but can be changed by you in Preferences. The Web sites chosen must accept decimal coordinates as URL arguments.
8. Advanced Search Enhancement
A subset of Stations reports now appear in the Search menu as Advanced Searches.
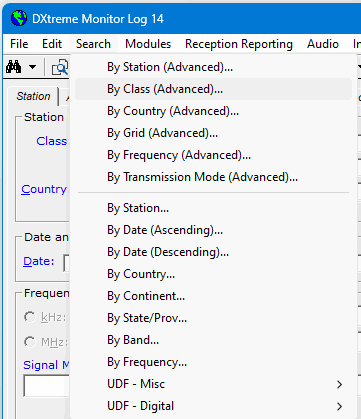
When invoked, the Display list box on the window defaults to Window and the caption of the window changes to Advanced Search: Type. You can double-click the log entry of a station to display its record on the Monitor Log window and the redesigned Advanced Search window persists so you can access additional log entry records.
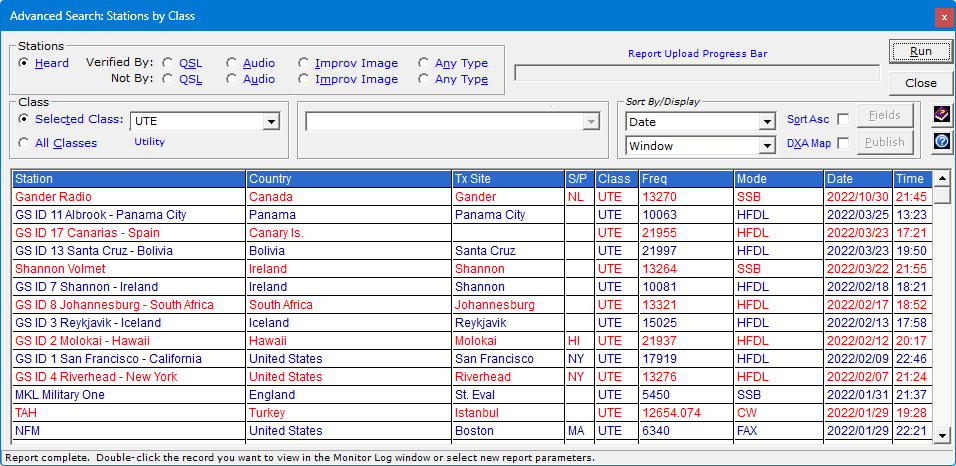
These Advanced Search windows can also be invoked from the Search button menu. And one Search window of any type can be selected as the default when the user simply clicks the Search toolbar button.
When Stations reports are invoked using the Reports menu, the Display list box on the window defaults to Web Viewer. If you change the Display list box to Window the caption of the window changes to Advanced Search: Type.
9. Case By Class Enhancements
When the Class list box is set to:
- Harm, Pirate, Spy, SWBC, Time, or UTE, double-clicking the Station box displays the station name in title case.
- Aircraft, FM, NDB, or TV, double-clicking the Station text box displays the station name in upper case.
- BCB or Ham, double-clicking or tabbing out of the field displays the station name in upper case.
- Any class, double-clicking the Tx Site box displays the transmitter site name in title case.
10. Direct Tune
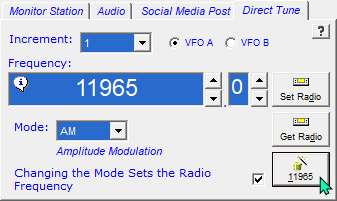
We've added:
- A Log Entry button that lets you tune your receiver to the frequency and signal mode of a displayed log entry.
- The ability to double-click the Frequency box, or press Alt-Bksp on your keyboard, to clear the box for the entry of a new frequency.
11. Audio Facility Workflow Improved
We have enhanced the audio facility so you can open your supported third-party audio application without starting a log entry. That way, recording can begin before (as well as during) logging. You can also set a default extension for the audio file name in Preferences.
12. Verification By Improv Imaging Added
Similar to the legacy Verification By Audio feature, where the presence of an audio file in a log entry designates the station as "Verified By Audio," the Verification by Improv Imaging feature counts the station as "Verified by Improv Image" if the Shows ID check box on the Improv Imaging tab is selected to indicate the presence of an ID on the window of a captured digital software application (such as PC-HFDL).
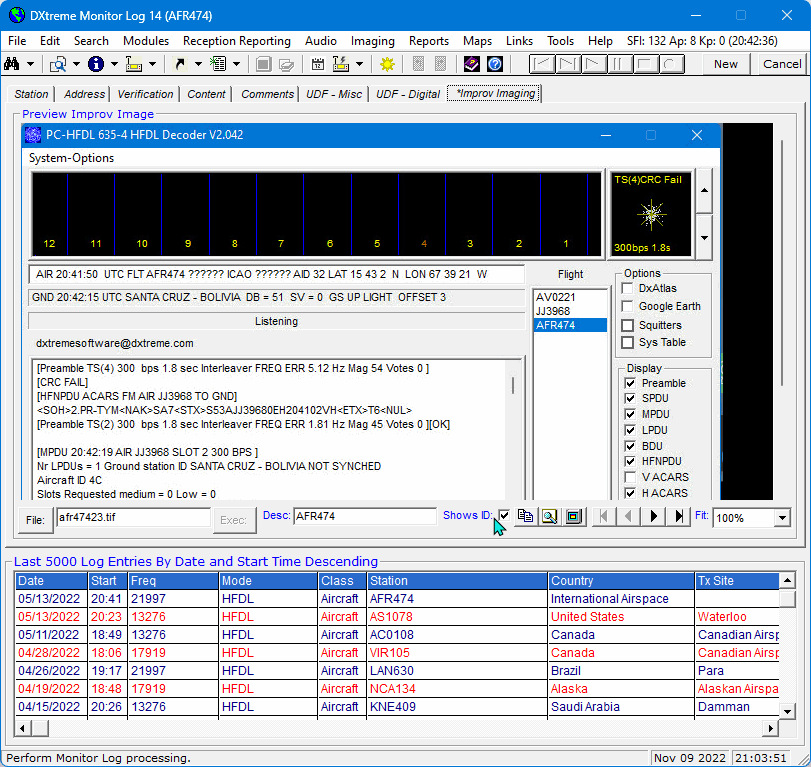
Performance, Stations, and Log Entries reports let you track verifications by QSL cards, letters, and eQSLs; the presence of Audio files presumed to contain IDs; and the presence of Improv Images for which the Shows ID check box is selected. Advanced searches also support searching by verification type.
Schedule Checker Enhancements
1. Scope of Verification Guidance Enhanced
When Schedule Checker advises you to monitor a station for a new or verified Country (and optionally Station), it does so now for the Class and QSL Type selected in Properties. Its advice appears in an upgraded legend on its window. The screenshot below indicates SWBC as the selected Class and QSL as the selected QSL Type.

QSL Types available for selection in Properties include:
- QSL — QSL cards, letters, and eQSLs.
- Audio — The presence of Audio files presumed to contain IDs.
- Improv Image — The presence of Improv Images for which the Shows ID check box is selected.
- Any Type — Any of the above.
Note: The Schedule Checker will list schedule items regardless of the Class selected, only the verification information for Countries (and optionally Stations) is affected by Class and QSL Type. Verification status is also independent of signal and/or transmission modes.
2. Signal Mode Tuning
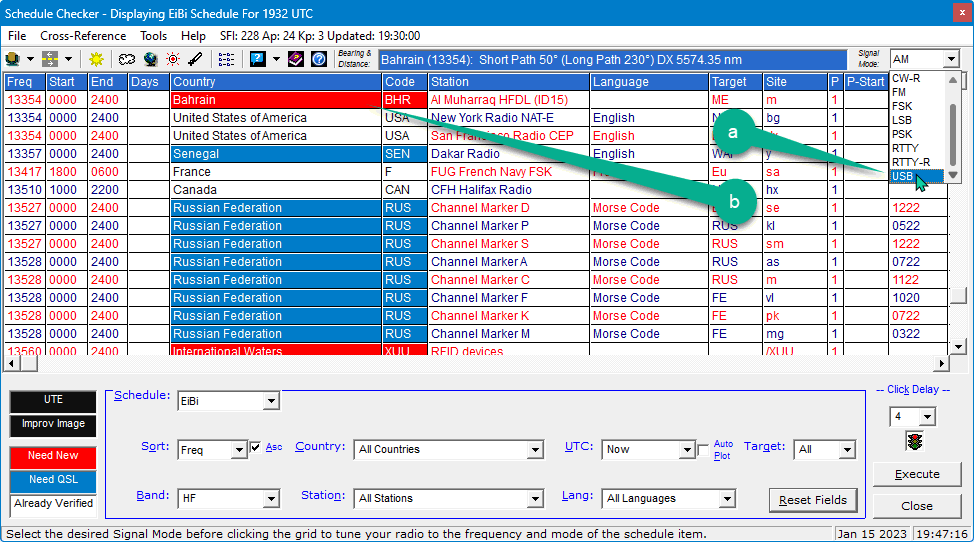
You can now tune your radio to the schedule item's signal mode along with its frequency by a) selecting the desired signal mode in the Signal Mode list box and b) double-clicking the schedule item.
3. New Schedule Type
We have added support for a new schedule type: Aoki Userlist. We took this action because Userlist schedules are sometimes finished before standard Aoki schedules.
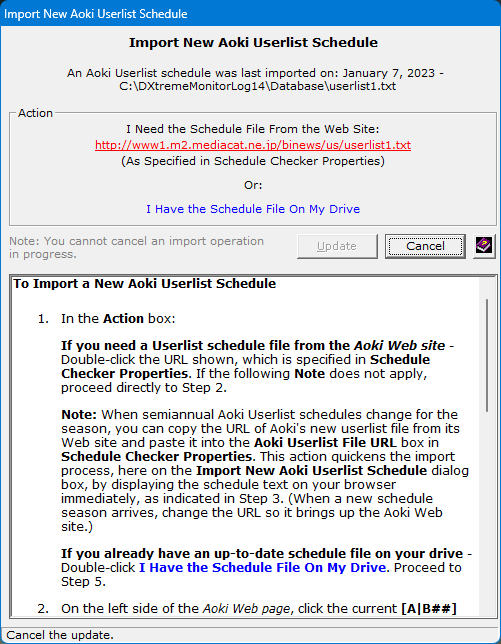
And we now embed the import documentation into the Import New Schedule window to make it easier to perform imports. The documentation is in the form of a Rich Text Format (RTF) document that can be easily updated, when necessary, by downloading a new document from the DXtreme Monitor Log 14 Information Center.
4. Click Delay
We have added a Click Delay list box to the Schedule Checker to let you increase or decrease the delay imposed when tuning your radio to the schedule frequency by double-clicking a schedule item. The adjacent traffic light graphic displays red while the delay is being imposed, and green when the delay is completed.
5. Default Signal Mode / Transmission Mode
We have added a Schedule Signal Mode list box to Schedule Checker Properties and renamed the Schedule Mode list box to Schedule Transmission Mode to support the default selection of a signal mode and transmission mode when logging a scheduled station. The Signal Mode list box on the Schedule Checker window is linked to the Schedule Signal Mode list box. Changing one, changes the other.
Imaging Enhancements
1. Workflow for Adding an Improv Image Streamlined
Begin by clicking the File button to generate a file name for the image, based on the name of the station. Or simply type a file name in the File box. Improv Imaging supports single-page .jpg files and single- or multi-page .tif files (preferred).
Click the Exec button. The New Improv Image command box appears. Select the desired function:

Type an optional description of the file in the Descr box.
And if you want to use the Verification by Improv Imaging feature (described earlier), make sure the image contains an ID of the station and select the Shows ID check box.
2. Quick Append
To quickly append a page to a current TIFF Improv Image, you can press Shift-F8 F8 F7 in quick succession. There will be no Capture dialog, so be prepared to draw the selection rectangle right after pressing F7. This feature is great for quickly capturing aircraft and utility stations displayed on decoding software applications.
3. Added Double-Click Image Correction to All Imaging Controls.
If a General, Improv, or QSL Image becomes distorted, or a portion of it is missing as you scroll, you can double-click the image to correct it.
Other Product Enhancements
1. By Frequency Report and Search Enhancement
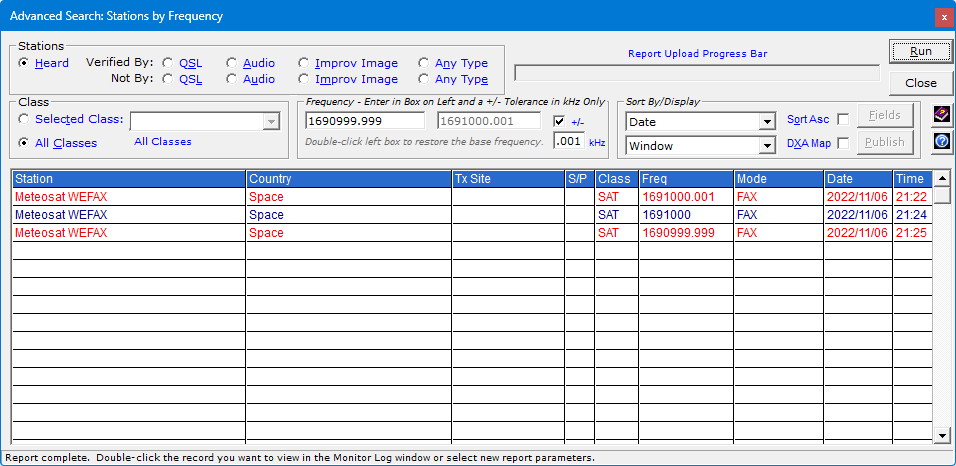
In addition to running Performance By Frequency, Stations By Frequency, and Advanced Search By Frequency queries for a single frequency, or a range of frequencies, you can now run a report or search for a single frequency and apply a +/- .001- to .999-kHz Tolerance value to the Frequency filter ...

To see the results:
2. User Defined Field Coordinate Link Enhancement
We have implemented User Defined Field Coordinate Link Definitions (UDFCLD).
Here's how it works:
If you use a UDF list box field to track your monitoring locations and you want Monitor Log to perform bearing and distance calculations and DX Atlas and HamCAP plots based on the monitoring location specified in each log entry, you can:
- Start Preferences.
- On the You tab, select the Link to UDF check box. This action turns on UDFCLD functioning.
- In the Link to UDF list box, click the name of the UDF you use to track your monitoring locations.
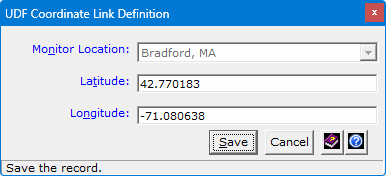
- Click Define. The UDF Coordinate Link Definition dialog box appears. The caption labeling the first list box is the name of the UDF you specified in Step 3.
- In the first list box, click the location for which you want to specify coordinates. If coordinates have already been specified, they appear and are available for editing, if necessary.
- In the Latitude box, specify the latitude of the selected location.
- In the Longitude box, specify the longitude of the selected location.
- Click Save. When you specify the displayed UDF monitoring location in a log entry, Monitor Log uses the coordinates you just defined when calculating the distance to the station monitored.
- Repeat steps 5 through 8 for each UDF monitoring location.
- When you have finished, click Close.
When UDFCLD is configured and activated:
- As stated, when you specify a monitoring location in a log entry, Monitor Log uses the coordinates of the monitoring location and the station monitored to calculate bearing and distance and display DX Atlas and HamCAP plots.
- When invoking DX Atlas and HamCAP plots from the Countries, Transmitter Sites, and Schedule Checker windows, Monitor Log uses the coordinates of the country, transmitter site, or schedule item plus yours as defined in the Latitude and Longitude fields of the You tab. In other words, UDFCLD is not involved.
- You can change your UDF coordinate link definitions any time you want. Keep in mind that if you delete a UDF, the system deletes its corresponding coordinate link definition.
- If Monitor Log cannot find your UDF coordinate link definitions for any reason, it uses the coordinates you entered in the Your Name and Address area.
3. Solar Indices Enhancements
- Acquisition of current solar indices has been changed from the FTP protocol to HTTPS, resulting in improved performance.
- Added editing of solar indices to the Monitor Log window.
- Restored automatic historic solar indices adjustments based on date and time changes made on the Monitor Log window — provided you have used the interface provided on the Edit menu of the Monitor Log window to download historic solar indices from the NOAA FTP site to the Solar subfolder.